Page 2 of 16 FirstFirst 123412 ... LastLast
Results 11 to 20 of 156

Thread: P2P Cloud DVR remote Access via a (remote) PC Using Guarding Vision PC Client Software

  1. #11
    Fuhrer, Vierte Reich DocAElstein's Avatar
    Join Date
    Aug 2014
    Posts
    9,313
    Rep Power
    10

    Link to here : https://excelfox.com/forum/showthrea...l=1#post158902 https://excelfox.com/forum/showthread.php/2769-P2P-Cloud-DVR-remote-Access-via-a-(remote)-PC-Using-Guarding-Vision-PC-Client-Software?p=15896&viewfull=1#post15902
    https://excelfox.com/forum/showthrea...are1#post15902
    https://excelfox.com/forum/showthread.php/2769-P2P-Cloud-DVR-remote-Access-via-a-(remote)-PC-Using-Guarding-Vision-PC-Client-Software#post15902


    _ 1-3) Install the Guarding vision to your computer. .
    Installing from .exe file after download
    You can select the option to open after download, https://i.postimg.cc/9QYCYMvt/Open-after-download.jpg , or open, https://i.postimg.cc/HkgTM5Pk/Open.jpg , or navigate to the file in the explorer and double left click on the file, https://i.postimg.cc/MGZxPwwk/Double...nstilation.jpg , or select to run after right clicking on the file, https://i.postimg.cc/G36Lc6FY/Run-Gu...n-explorer.jpg , etc.. etc…

    On starting to install, typically a warning will appear https://i.postimg.cc/T2HgdNSX/Admin-...ing-Vision.jpg , and after clicking OK to that a typical set of installation windows appear. The process is usually very quick.

    https://i.postimg.cc/C5rf1745/Preparing.jpg
    https://i.postimg.cc/NfP1fsND/Install-Wizzard-start.jpg
    InstallWizard2.JPG http://i.imgur.com/X3RdzQm.jpg https://i.postimg.cc/XqYC4mdt/Wizzard-2.jpg
    InstallWizard3.JPG http://i.imgur.com/auEGcoe.jpg https://i.postimg.cc/Ssr90k2W/Wizzard-3.jpg
    InstallWizard4.JPG http://i.imgur.com/qRS0pwQ.jpg https://i.postimg.cc/LXRP0nX9/Wizzard-4.jpg
    InstallWizard5 Installing.JPG : http://i.imgur.com/30gYaan.jpg https://i.postimg.cc/xdLHRK9p/Wizzard-5.jpg
    InstallWizard6 Installing.JPG : http://i.imgur.com/1QRjWA2.jpg
    InstallWizard7 Installing.JPG : http://i.imgur.com/tnQPTTb.jpg https://i.postimg.cc/XYRdd26y/Wizzard-7.jpg
    InstallWizard8 Install Finish.JPG : http://i.imgur.com/BCaYc9a.jpg https://i.postimg.cc/9QRyD6Kh/Wizzard-Finish.jpg


    Usually an icon will appear after finishing the install
    Installed Icon.JPG : http://i.imgur.com/NvZCwDi.jpg https://i.postimg.cc/VLgQTTkX/Icon-appeared.jpg

    In Windows 10 there are some Bugs which may cause the appearance of an icon either not to appear or to appear delayed or not shown correctly. Usually this problem is overcome by navigating to the desktop in explorer, or searching for the application, where usually the icon will be shown. Then simply clicking on it , or failing, that copying it , or dragging it, from the windows explorer desktop window, or from where you see it, to the actual desktop will sort out the problem and the icon will be displayed normally
    https://i.postimg.cc/jSj0rXDm/Opened...-was-there.jpg
    https://i.postimg.cc/jSkVq7N5/Window...-searching.jpg

    https://i.postimg.cc/bJbLM2Mm/Right-Click-Copy-link.jpg
    https://i.postimg.cc/jjDMH1h0/Paste-link-on-desktop.jpg
    https://i.postimg.cc/52N70yYt/Pasted...on-desktop.jpg


    These sort of things are a bit quirky and unpredictable in Windows 10.
    Last edited by DocAElstein; 11-17-2021 at 01:40 AM.

  2. #12
    Fuhrer, Vierte Reich DocAElstein's Avatar
    Join Date
    Aug 2014
    Posts
    9,313
    Rep Power
    10


    1-4). Run Guarding Vision software for the first time and register the administrator ( “Super User” ) account

    Simply double click on the desktop icon for the first time***, and you will be prompted to make a username and password. This is the 3rd of the 4 username and password pairs that we have to deal with. This one is reasonably easy to understand: It is simple a username and password to let you use the guarding Vision Software on a particular computer.
    If you remember to check , ( or leave it checked as it usually is by default ) , the Enable Auto-login box, then you will probably never need to concern yourself with this username and password pair ever again. But never the less, it does no harm to make a note of it somewhere, just in case it is ever needed again.
    https://i.postimg.cc/BQfG7T81/Regist...-Aut-login.jpg
    https://i.postimg.cc/G3yCj7pC/Regist...nmark-Star.jpg

    So in the working example that I am using for this Blog this is the user name and password ( for the administrator account, ) required to log in to the Guarding Vision PC Client software on the PC that I am using for this worked example:
    DocAElstein
    Gaudy.!*


    As far as I know, this user name and password is only held in the installed software and no where else. It is only required to open the installed software on a particular computer. So if you lose this user name and password, ( or as unfortunately does happen, the username and password is no longer recognised ), the simplest way around it is to de install the software and re install it. If you have a lot of time, an alternative is to contact Sannce Support who after a few weeks of correspondence may understand what you are asking and then guide you in a way to reset the user name and password ,
    SANNCE Model: DN81BL I am using correct password. But it is no longer being accepted
    https://support.sannce.com/hc/en-us/requests/1164553
    Password Recovery.doc
    https://app.box.com/s/9uszzgjf48t1fsbn5uhbo67y58bkakr2
    61.5 KB
    DN81BL I am using correct password. But it is no longer being accepted.doc
    https://app.box.com/s/k9cc1zepe3nzk8atye167rhmiudonybd
    202 KB
    Sannce2PasswordResetCatastrohy.doc
    https://app.box.com/s/85khysah0rhdpdfy9wan7ne7ubj92nn2
    SADPTool.exe
    https://app.box.com/s/0n78g9bh72ygtwu03acc6aothfeybwf0
    36.3 MB


    ***Note: You may occasionally get various security or similar warnings, depending on your own various security settings, example:- https://i.postimg.cc/1z7LP6vP/Allow-Access.jpg
    Usually these can be either be ignored and/ or simply agree to allow what the Guarding Vision Software to do what it is wanting to do


    We now have the software running,
    https://i.postimg.cc/MpHYJzYB/Initia...ine-device.jpg
    ( you may occasionally get an extra Help suggestion window showing https://i.postimg.cc/g27HY1MT/Extra-...Vision-use.jpg )
    ( The Super User name which we made on running the Guarding Vision software for the first time, ( - I chose _ DocAElstein _ ) , and that you would login with in subsequent opening, is shown in the top ribbon https://i.postimg.cc/c4JmZ3qD/Guardi...bbon-above.jpg )
    Note also, that for the purposes of our working examples, we have , or should have, at all times, our DVR connected to the same router/modem as the computer that is running the Guarding Vision Software. This can be seen indicated in the On Devices in the bottom window.
    https://i.postimg.cc/MpHYJzYB/Initia...ine-device.jpg
    https://i.postimg.cc/jjcDv7pY/Initia...N-username.jpg

    ( You can also see in that shown Online Device, ( which is our DVR ) , the full long character Device Serial No. , https://i.postimg.cc/jjcDv7pY/Initia...N-username.jpg , also contains the effective 9 character user name serial number , SN , of our DVR, F53992124 , which we have discussed previously as one of the user names that we need to know about ).
    ( Note the use of the horizontal scroll bar to get at all the information:
    https://i.postimg.cc/fWgThmLG/Online-Device-1-1.jpg https://i.postimg.cc/MH4Wb2N6/Online-Device-1-2.jpg https://i.postimg.cc/SRjSMNZ1/Online-Device-1-3.jpg )

    If no Online Device is showing, then don’t go any further!!!
    If our DVR is not shown, https://i.postimg.cc/nhKG5HkP/No-Online-device.jpg , then something has gone wrong, and before we go further we should check to see if we can cure this problem, https://excelfox.com/forum/showthrea...ll=1#post16054

    All further setting up is concerned with Adding information to it to allow a PC to view in a similar way to which the monitor is used in the simplest use of the DVR
    There are two ways to do this viewing via a PC,
    (ii) 2a: Local LAN Access, ( making use of a typical modern internet Modem/ Router ‘s secondary LAN / central Server type function )
    (iii) 2b: Cloud P2P Remote Access ( via the internet, ( will also need a typical modern internet Modem/ Router ) )


    Conclusion/ Summary of what we see initially:
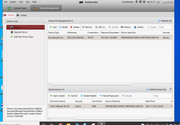
    We are initially looking at Device Management , and by default a Device Type has been added automatically
    So we are looking by default at the Device Management , and by default a Device Type has been added automatically, but at this stage there is nothing in it, so no actual device is being manages. But we can see that a device is available in the Online Device window. It is not essential to have a device showing in the On Line window in order to manage a device, but it is helpful if we want to manage that device, as the software will automatically recognise some details relating to that device, and this will mean that we may have to add less details ourselves when managing it.
    ( Managing is, in the first instance , mostly concerned with + Adding it. This so called with + Add basically means making it available for use in one way or another.


    https://i.postimg.cc/MpHYJzYB/Initia...ine-device.jpg
    https://i.postimg.cc/GtJvfKPs/Device-Manager.jpg

    Device Manager.JPG


    ________Device Managemant
    _ Device

    _Device Type_

    _#_Device__
    Last edited by DocAElstein; 11-17-2021 at 11:19 AM.

  3. #13
    Fuhrer, Vierte Reich DocAElstein's Avatar
    Join Date
    Aug 2014
    Posts
    9,313
    Rep Power
    10


    Importance of maintaining a working LAN connection to DVR for our demonstration and working example of setting up procedures

    Very important, is to have a working strong internet connection to the LAN socket via a LAN RJ45 Ethernet cable to your Router or modem, https://i.postimg.cc/wMbWK1Wm/Router...o-computer.jpg .
    If you have a successful working internet connection, the furthest most green of the lights at the front , https://i.postimg.cc/1tkMmkGW/DVR-BN...t-internet.jpg , of the DVR should flicker on., https://i.postimg.cc/W3ggnhZn/Right-...g-Internet.jpg . The brightness of this light gives an approximate indication of the strength of the signal. If you have no green light or just a weak dim light, you might consider changing the LAN RJ45 Ethernet cable , possibly to a shorter one. My experience suggests that the DVRs from Sannce require a better and stronger LAN internet connection than most average computers and other devices do. I have also had two DVRs fail / become defect/ useless , at least as far as using local PC LAN (ii) or PC Cloud P2P (iii) is concerned, when they no longer reacted to any working LAN connection ( https://support.sannce.com/hc/en-us/requests/1492131 )


    We note also that different options are available to us in the Guarding Vision Software, in particular for the P2P remote availability setting up, as a result of having a LAN cable connection to the same router/ modem to which our PC is connected.
    Last edited by DocAElstein; 11-17-2021 at 02:25 AM.

  4. #14
    Fuhrer, Vierte Reich DocAElstein's Avatar
    Join Date
    Aug 2014
    Posts
    9,313
    Rep Power
    10

    Link to here : https://excelfox.com/forum/showthrea...l=1#post158903 https://excelfox.com/forum/showthread.php/2769-P2P-Cloud-DVR-remote-Access-via-a-(remote)-PC-Using-Guarding-Vision-PC-Client-Software?p=15896&viewfull=1#post15903
    https://excelfox.com/forum/showthrea...are1#post15903
    https://excelfox.com/forum/showthread.php/2769-P2P-Cloud-DVR-remote-Access-via-a-(remote)-PC-Using-Guarding-Vision-PC-Client-Software#post15903


    1-4). Run Guarding Vision software for the first time and register the administrator account.


    Introduction and discussion of the way I have chosen to proceed with the explanations
    The main purpose of all my Blog here , is to get the remote Access via a (remote) PC using Guarding Vision PC Client Software
    We do actually have enough information to do this , at this stage, from a remote source which is away from where the DVR. In other words, theoretically, we could proceeded as if from now on
    _ we have no direct access to the DVR
    and also
    _ our PC has no direct ( LAN cable or WLAN wireless connection ) connection to the same router / modem to which the DVR is connected. ( But note*** , that the DVR must have a reliably working internet connection via the LAN socket to a router/modem or some other means to connect it to the internet: It must be “On line)

    In other words, we could proceed as if we were travelling “away from home” and have our PC or Laptop with us

    However, it is much easier to understand, and has a better chance of initial and later success, if we proceed in a more logical progression.
    In this logical progression we will in the next section remain “at home” , or physically close to the DVR.
    So we are assuming that we unpacked and did the initial first quick set up and are still using the (i) most simple use of the DVR and cameras and monitor (i) ( and have the mouse still connected to the receiver )

    We will then go on to the next way, (ii) , the “local LAN way”, to use the DVR, which is local PC use of the DVR

    Finally we will go on to the P2P Cloud way, (iii) , which is the remote PC way
    We note that at this final stage we will still be coincidentally connected to the same router / modem as the DVR, but this is just because of the way we have decided to progress in order to set up the final P2P Cloud way. However, at this final point we need do no more than simply take our PC to some remote point , ( theoretically anywhere in the world!), and as long as we can connect hat PC in some way to the world wide web internet at this remote location, then if all has gone well, we should be still able to access the DVR, that is to say view using the cameras that are connected to the DVR, and the pictures should appear close to real live time on out PC screen. This last functioning arrangement is the main goal of my entire Blog here . At that point , this Blog is finished, although note that we will discus the three different ways to get at the final P2P Cloud way: _ -A- _ -B- _ -C-
    Remote ( Cloud P2P ) Access of DVR over the internet with a PC using Guarding Vision Windows PC Client Software,
    2b) -A- ______ Following on from previously obtaining LAN local access, and
    Adding ( making available ) DVR for remote Cloud use for the first time: DVR is not yet Registered for P2P remote Access
    https://excelfox.com/forum/showthrea...ll=1#post15912


    2b) -B- Cloud P2P remote access if you know the password and username of Sannce registered account holding DVR P2P relevant information
    https://excelfox.com/forum/showthrea...ll=1#post15918


    2b) -C- Cloud P2P remote access if no Sannce registered account holds DVR information
    Possible Problem! Need to remove details of DVR from Sannce registered devices
    https://excelfox.com/forum/showthrea...ll=1#post15919


    ***Very important, is to have a working strong internet connection to the LAN socket via a LAN RJ45 Ethernet cable to your Router or modem, https://i.postimg.cc/wMbWK1Wm/Router...o-computer.jpg .
    If you have a successful working internet connection, the furthest most green of the lights at the front , https://i.postimg.cc/1tkMmkGW/DVR-BN...t-internet.jpg , of the DVR should flicker on., https://i.postimg.cc/W3ggnhZn/Right-...g-Internet.jpg . The brightness of this light gives an approximate indication of the strength of the signal. If you have no green light or just a weak dim light, you might consider changing the LAN RJ45 Ethernet cable , possibly to a shorter one. My experience suggests that the DVRs from Sannce require a better and stronger LAN internet connection than most average computers and other devices do. I have also had two DVRs fail / become defect/ useless , at least as far as using local PC LAN (ii) or PC Cloud P2P (iii) is concerned, when they no longer reacted to any working LAN connection ( https://support.sannce.com/hc/en-us/requests/1492131 )
    Last edited by DocAElstein; 11-17-2021 at 02:14 AM.

  5. #15
    Fuhrer, Vierte Reich DocAElstein's Avatar
    Join Date
    Aug 2014
    Posts
    9,313
    Rep Power
    10


    2 Using DVR with a PC
    Using PC Client software, Guarding Vision


    2a: LAN Access
    Page 2, Post #16
    https://excelfox.com/forum/showthrea...ll=1#post15905
    https://excelfox.com/forum/showthread.php/2769-P2P-Cloud-DVR-remote-Access-via-a-(remote)-PC-Using-Guarding-Vision-PC-Client-Software?p=15905&viewfull=1#post15905
    https://excelfox.com/forum/showthrea...ll=1#post15905 https://excelfox.com/forum/showthread.php/2769-P2P-Cloud-DVR-remote-Access-via-a-(remote)-PC-Using-Guarding-Vision-PC-Client-Software?p=15905&viewfull=1#post15905


    2b: P2P Access
    Page 3, Post #21
    https://excelfox.com/forum/showthrea...Software/page3
    https://excelfox.com/forum/showthread.php/2769-P2P-Cloud-DVR-remote-Access-via-a-(remote)-PC-Using-Guarding-Vision-PC-Client-Software/page3
    https://excelfox.com/forum/showthrea...ll=1#post15910
    https://excelfox.com/forum/showthread.php/2769-P2P-Cloud-DVR-remote-Access-via-a-(remote)-PC-Using-Guarding-Vision-PC-Client-Software?p=15910&viewfull=1#post15910
    https://excelfox.com/forum/showthrea...5910#post15910 https://excelfox.com/forum/showthread.php/2769-P2P-Cloud-DVR-remote-Access-via-a-(remote)-PC-Using-Guarding-Vision-PC-Client-Software?p=15910#post15910
    Last edited by DocAElstein; 11-17-2021 at 11:19 AM.

  6. #16
    Fuhrer, Vierte Reich DocAElstein's Avatar
    Join Date
    Aug 2014
    Posts
    9,313
    Rep Power
    10


    2a) LAN Access
    ( A Default device Type has been opened/selected automatically
    )


    The instructions in section Step 2a: LAN Access here , https://support.sannce.com/hc/en-us/...arding-Vision- , are reasonably good and accurate, and the instructions I am giving are basically those , with some elaborations and expanded clarifications and explanations.


    So we should be on opening for the first time at the point in the discussions of seeing this: https://i.postimg.cc/MpHYJzYB/Initia...ine-device.jpg

    But that initial opening screenshot is somewhat misleading as something has already been done on opening to produce that.
    To explain:


    #_ Standard Device Selection (Selected by Default) ( Default standard device selected on/by opening software: Device )
    A Default device type has been opened/selected automatically
    This emphasises again, that a device type has been added automatically. I am and have been continuingly stressing this because it helps to understand later sections, where we need to add the type ourselves
    ( #_ A “Standard device” could be any directly / locally connected device so can include our PC LAN Access )
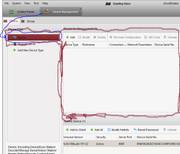
    What all the current literature does not explain very well is that, by default, the Guarding Vision has one Device type by default selected / highlighted in brown,
    https://i.postimg.cc/vH04cL3V/Device...ype-Device.jpg
    ________Device Managemant
    _ Device

    _Device Type_

    _#_Device__

    which has effectively been pre selected , and has evoked the large window to the right, and so that is what the large window to the right ( Device For management (0) ) is referring to:
    https://i.postimg.cc/3xWdp4cb/Device...ype-Device.jpg


    + Add New Device ( automatically done on software opening )
    Just to clarify what I am saying: Effectively the software on the event of opening , has itself automatically selected the
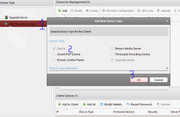
    + Add New Device Type
    , then a default device was added
    https://i.postimg.cc/Mp4XYZkZ/Add-De...ult-device.jpg https://i.postimg.cc/3xWdp4cb/Device...ype-Device.jpg


    At this stage we have no entry : The large “Standard device” window to the right is empty. We have to Add something there to make the device with the Added details available. A “Standard device” could be any directly / locally connected device so can include our PC LAN Access


    So we have in this post , ( or rather by default the opening of the Guarding Vision software has automatically ) , Added a Device Type.
    The next step, in the next post, will be to Add a specific device, ( in this case our DVR in the local LAN direct connection )


    I would just make one final comment here. The final indication of our device in the Device Management showing as this,
    _#_Device ___________
    , is somewhat misleading in my opinion. - Whilst the small blue symbol is attempting to indicate that we are referring to locally connected to the DVR things since that symbol is of a DVR, https://i.postimg.cc/50LNjJyP/Small-...ice-symbol.jpg
    , I personally think something like this ,

    _#_Device _( Local )____
    , would better help us distinguish from the P2P entry which we will later encounter and looks like this

    _#_ Cloud P2P Device ___


    Last edited by DocAElstein; 01-02-2022 at 03:06 AM.

  7. #17
    Fuhrer, Vierte Reich DocAElstein's Avatar
    Join Date
    Aug 2014
    Posts
    9,313
    Rep Power
    10


    Make Entry for Standard local Device - + Add an actual type to the standard type management presented to us by default
    So , as explained in the last post, on opening Guarding Vision software for the first time, a device type had been added automatically. We could call this a local or standard device.
    A Standard device could be any directly / locally connected device, so can include our PC LAN Access

    One way to make this entry is to use the +Add button of the large window in which things are written in / Added
    https://i.postimg.cc/sxXB3wbK/Add-Button.jpg https://i.postimg.cc/tTDZ0LvY/Add-a-...ice-Button.jpg
    That is a fully acceptable way to Add a particular device, but as we have an Online Device showing in the Online Device window below , ( which is the one we want to Add ) , we can take advantage of the button by the Online Device window to add that device. This way has the advantage of adding in some of the details for us: The basic entry dialogue boy that comes up is identical to that which comes up with the standard Add button of the large window , but on opening after using the +Add to Client button, some of the entries will be already written for us: https://i.postimg.cc/XvfBLZwK/Add-a-...ent-Button.jpg – Specifically the local address in our LAN network of our DVR , 192.168.2.100
    We need to write in two entries, the User name and Password pair, which we discussed as the first user name and password pair that we met , which we named “ userame and password pair by first time DVR with Monitor, and needed in later LAN use on a computer
    admin
    Sannce.!*

    ( We also need to add a “Nickname” of our choice. This will be used as a name on any button to select this device. It can be any name we chose. I personally prefer to use something to help remind me what it is referring to, something like
    DVR_LAN _ DN81BL _F53992124

    So we fill in the three bars and hit the Add button in the Add dialogue box, https://i.postimg.cc/vZ6V12TN/Add-a-...ent-Button.jpg
    https://i.postimg.cc/3wYFHdJv/Fill-i...en-LAN-add.jpg

    Since we are accessing a local directly connected device, this connection/Adding process , ( typically referred to as Importing ) will usually be very quick.
    A small black window bottom right to confirm the success will typically pop up just for a very short time , https://i.postimg.cc/q7VC2cCM/Importing-Succeeded.jpg , and this ,along with the details appearing in the main window including the Net Status** symbol indicating a working connection, https://i.postimg.cc/GhfDmnLD/Net-Status-Good.jpg , will mean that almost certainly we can view our cameras now on our computer. This viewing is always done in a similar way for any added devices, but note that after the first viewing there is a small change to allow quicker viewing on any subsequent viewing. More detail on this viewing in the next post.


    Summary: Our first ( device management ) action
    So, at this stage, we opened the Guarding Vision PC Client Software for the first time, which by default had added a device type, ( a simple local device type) , and we had an online device showing, ( - our DVR was showing because we had connected it via a LAN cable to the same modem/router as our computer).
    Because our DVR was showing as an online device, this simplified the adding of a particular simple local device, our DVR, which we did in this post.

    We are not viewing anything yet on our computer, as we have just done some managing of the DVR. ( The next post takes the simple steps to now actually do our first viewing with a computer )

    https://i.postimg.cc/g2vH5vdp/Finish...LAN-device.jpg https://i.postimg.cc/BQtDWR94/Finish...LAN-device.jpg
    Finished first use of Device Management added the online LAN device.jpgFinished first use of Device Management added the online LAN device.jpg


    ( Note in those last screenshots we have scrolled to the right in the second ( right ) screenshot to get all information )


    ( **Note , incidentally, that the Net Status is referring to the online status of the computer, and is not an indication of the status of the LAN cable connection to the DVR . ( Should the computer go off line, the Net Status will change thus: https://i.postimg.cc/637LBrgr/Net-St...er-Offline.jpg ) )
    Last edited by DocAElstein; 11-17-2021 at 12:37 PM.

  8. #18
    Fuhrer, Vierte Reich DocAElstein's Avatar
    Join Date
    Aug 2014
    Posts
    9,313
    Rep Power
    10
    Viewing cameras on Computer ( for first time )

    The viewing on a computer via Guarding Vision Software, of a camera , or cameras, which are connected to the DVR can be done at any subsequent time via the uppermost small View tab,
    https://i.postimg.cc/SK2nSyVY/View-M...-first-use.jpg
    View


    _#_Main View______

    ,( but note that after the first time of taking this action , an extra larger Main View main tab will appear and from then on it is always there , https://i.postimg.cc/rp5GgCWp/New-Ma...se-of-View.jpg )
    _#_Main View_


    The + and - ,
    https://i.postimg.cc/2jGwPwtb/Main-View-Showing.jpg https://i.postimg.cc/HsPtLLdT/Main-View-Showing.jpg
    ,are an indication of an added device.

    ( If we were to Delete this device, https://i.postimg.cc/8cZmMpvB/Delete-device.jpg , the entry remains when Viewing , but we lose the camera view and the drop down list resulting in no indicated + or - , https://i.postimg.cc/sxyx45z5/No-vie...t-No-shown.jpg

    If , after Deleteing a device, we re add it using the same Nickname then we will not get a duplicate entry in any View window: In general any Nickname appearing will remain there, and having or not having the + or - is the indication of whether that named device is actually available/ has been Added


    The Software will in general always be cycling through to keep the camera views updated / refreshed. This process can often get stuck, or it may be slowly checking through all camera ports on the DVR, even those to which no camera is connected . To “wake up” the system we have the possibility to refresh/ restart a camera group, https://i.postimg.cc/pLhJ5tLz/Main-V...ossibility.jpg ,or alternatively a double click on a camera from the groups drop down list, https://i.postimg.cc/fLYkdBGw/double...to-wake-up.jpg , will also act to “wake up” / re start the viewing using that particular camera, https://i.postimg.cc/mrvth06X/double...wake-it-up.jpg
    Last edited by DocAElstein; 11-12-2021 at 02:04 PM.

  9. #19
    Fuhrer, Vierte Reich DocAElstein's Avatar
    Join Date
    Aug 2014
    Posts
    9,313
    Rep Power
    10
    _________
    Last edited by DocAElstein; 11-12-2021 at 03:17 PM.

  10. #20
    Fuhrer, Vierte Reich DocAElstein's Avatar
    Join Date
    Aug 2014
    Posts
    9,313
    Rep Power
    10
    _________________
    Last edited by DocAElstein; 11-12-2021 at 03:18 PM.
    ….If you are my competitor, I will try all I can to beat you. But if I do, I will not belittle you. I will Salute you, because without you, I am nothing.
    If you are my enemy, we will try to kick the fucking shit out of you…..
    Winston Churchill, 1939
    Save your Forum..._
    _...KILL A MODERATOR!!

Similar Threads

  1. Replies: 5
    Last Post: 06-10-2019, 10:14 PM
  2. Replies: 18
    Last Post: 06-10-2019, 10:14 PM
  3. Replies: 19
    Last Post: 06-10-2019, 10:14 PM
  4. Testing Posts, Internet, Forum Software
    By DocAElstein in forum Test Area
    Replies: 17
    Last Post: 12-23-2018, 04:46 PM
  5. Replies: 17
    Last Post: 12-23-2018, 04:46 PM

Posting Permissions

  • You may not post new threads
  • You may not post replies
  • You may not post attachments
  • You may not edit your posts
  •