Page 52 of 94 FirstFirst ... 242505152535462 ... LastLast
Results 511 to 520 of 935

Thread: Windows 10 and Office Excel

  1. #511
    Fuhrer, Vierte Reich DocAElstein's Avatar
    Join Date
    Aug 2014
    Posts
    9,313
    Rep Power
    10
    From April 2022
    This is post
    https://excelfox.com/forum/showthrea...e-Excel/page52
    https://excelfox.com/forum/showthrea...ge52#post12786
    https://excelfox.com/forum/showthread.php/2408-Windows-10-and-Office-Excel/page52#post12786


    Its early April, 2022, and I am thinking about going outside for the summer to finish building my Bavarian castle. So I will tidy up my Debloat windows 10 script stuff, and forget about untill next winter

    Review where am I.
    In February/March 2022, I had to some repair work after strong storms, and watched a lot of videos learning PowerShell script.
    Chris did some updates on his Debloat script, and I finally found out how to get scripts from the time to match older videos. So I did a few more posts in the last two pages,
    _ Page 50, from https://excelfox.com/forum/showthrea...ge50#post12774 to get my script updated to Chris’s latest
    _ Page 51, from https://excelfox.com/forum/showthrea...ge51#post12780 to go again through the main Debloat videos with the benefit of having the actual scripts to which the videos were referring

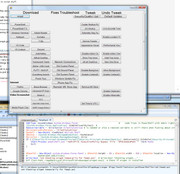
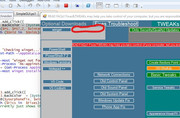
    So I am was up to my version Temp6.ps1 , and my GUI looked something like this:


    _......So , moving on quickly, so I can switch the computer off until next winter

    _.____________________________

    Start with the GUI (size)
    I will take a finger in the wind guess, or estimate, a guestimate, based on all in my head, to try and start with approximately of what the final GUI should be like.
    An Idea might be to have it have things in it making it very wide, possible deep also, but to make effective use of the scroll bars, for example to “hide” things that should possibly not be used too recklessly, or things I am not so interested in currently.
    I will need to make the actual given size smaller. – That is just how it seems to work – set a smaller size than needed to hold all panes and other things you put in it.

    The height will be some average of all issues come across so far, something like, 600.
    I will start with about '800, 600' ( width , height )

    GUI better formatting, colours?
    I think I may have been a bit mislead by some Blogs and YouTube videos into thinking that the simple PowerShell script GUI is boring. Not true. PowerShell, unlike the simpler Shell cmd black window stuff, is somehow linked into the same Object orientated program stuff that Visual Basic is.
    I had an little initial fiddle with colours, and made a few other minor updates, and fiddles, taking my version to Temp7.ps1 , https://app.box.com/s/fttlmwny6y4s5ub1q66kvqbrw2ppxdwz
    jdklad

    Resizable GUI window and Scroll bar.
    A working scroll bar is no problem – one code line. A GUI is resizable as standard default.
    Just one subtlety , as mentioned before: If you want a scroll bar to always be there, as I do, you need to place things outside the window size. The script will not error if you do that. The things outside your given window size will need to be got by scrolling. Hence the scroll bar is there from the start.
    (If you had all things placed and dimensioned inside your main given GUI size window, then the scroll bars do mot apper at first. They will appear if needed, if you reduce the size ( by dragging right or bottom perimeters ) such that things no longer fit in.
    A convenient way to achieve what I want is to simply dimension Panels larger than the given GUI window size ( Panels are crudely similar to like GUI Windows inside, and fixed in, the GUI )

    So I have my Panels conveniently set to such a size such that they are like columns deeper than the set main GUI window size.
    For forcing the wider width, simple long comments or extended headings will do, as that is something I like generally in coding. Or alternatively stuff I might be experimenting with and/ or not sure I want to keep it there finally


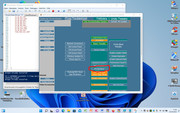
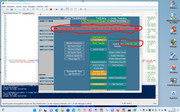
    Results
    https://i.postimg.cc/ZKy0hPKC/Scroll...in-for-now.jpg
    https://i.postimg.cc/sfL18Hzk/Scroll...-red-stuff.jpg


    The next posts I do things in the next 6 Months a bit ad hoc, a few random things, progressing slowly when I feel like it..

    I might be a bit extravagant going up in version numbers. There might not be many changes from one version to the other, but text storage is very easy and cheap, and it’s a simple alternative to a GitHub version control catastrophe, in seeing where changes might have introduced problems!
    ( Thank god they banned me from GitHub, - I might otherwise of wasted my life trying to figure the place out. In the meantime Microsoft would have infiltrated it, if they haven’t already, and would be running the rest of my life, Lol ))


    Temp6.ps1 – Black and White - https://app.box.com/s/sn8dsqt237zffgkmjaqnvn7ewvqjdou8
    Temp8.ps1 - Colour - https://app.box.com/s/9b9li86s7dyysr7exdle30pckgp7vscz
    Last edited by DocAElstein; 04-02-2022 at 11:19 PM.

  2. #512
    Fuhrer, Vierte Reich DocAElstein's Avatar
    Join Date
    Aug 2014
    Posts
    9,313
    Rep Power
    10
    ISE v Microsoft Office VBA VB Editor
    I am very comfortable with the ISE, after I finally noticed it.
    After a bit of fiddling I find it almost as good as the VBA VB Editor.
    They look similar, and they are similar to a large extent

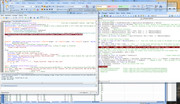
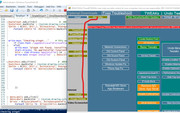
    Looking at that last screenshot, we could say to a first approximation, as a Layman explanation,…
    The PowerShell Window attached at the bottom of the ISE is similar in its working to the Excel Spreadsheet from which that VB Editor on the right belongs to ( You get that VB Editor up, from an open Excel spreadsheet, if you hit Alt+F11 ):…
    When you run the ISE script, stuff goes on from within that PowerShell window, even if that is less obvious ; When you run coding in the VB Editor, stuff typically goes on from in the Excel spreadsheet, which is often more obvious since the spreadsheet may be caused to change by the coding.
    Its all a bit more complicated than that, but that is a good initial Layman explanation.

    Subtle difference in debug step mode, ( running line by line) - workaround
    In the VB Editor its very easy. Click anywhere in the coding that you want to step through, then hit F8 and then each hit of F8 takes you to the next line, starting from the top
    ( If you want to start a bit further down, select the line you want to start from, hit F9, and that should cause that line to be highlighted in brown. ( That is called a stop point, ( you can also get it in the VB editor by clicking in the left margin where you want the stop point ) )
    Now first hit the play button or F5. That takes you as far as the brown line, ( the coding runs and stops at the brown line). Now proceed as before with F8 to step line by line further.
    A simple trick allows you to do the same in the ISE.
    The stop point works the same. Use it to set a stop point towards the start of the script, or from where you want to step through the script. So, for example, select the first script line and hit F9. The first line should now be highlighted in brown.
    After that it’s the same as with VB Editor, except use the F11 in when in the ISE, (rather than F8 as when in the VB Editor)

    ( If at any point during the stepping through, you want to continue from where you are normally:- it’s the same for both ISE and VB Editor: Hit the play button or F5. The code or script should then run normally from the point at which it ways when you do that )


    ( The difference in hoe ISE and VB Editor behaves here, seems to be a result of the PowerShell script needing to at least start running, even if you have it stopped at the start. This might explain why you get much better real time warnings of syntax errors as you write coding in the VB Editor. I will take a gauss that VBA somehow constantly does a quick run secretly as far as you are, or maybe its some sort of real time compiling, which I guess has the same effect )

    Note: The F9 is a toggle thing – so to remove a stop point, select that brown highlighted line, hit F9, and the stop point should be taken off, indicated by the brown highlighting vanishing.


    Ref
    https://www.improvescripting.com/how...shell-scripts/


    Adding code to existing script

    Adding code to existing script ( merging ) , ( in particular without changing line numbers or shifting existing code up or down )
    ( Example IP hosts block merge )
    This requirement is mostly just because I want to keep up to date with Chris’s stuff. So I don’t want to unnecessarily to shift things around too much.
    I have created space in which to add my new scripting, because I # commented out the script of Chris’s that I don’t use. But I would like to keep it there for future reference, and to help me keep up to date with his stuff without losing the orientation
    So that’s all well and good. No problem for adding a few code lines.
    But it’s a pain in the arse for adding longer script, because in order to keep Chris’s stuff I must paste in line by line in the space – you can’t paste multi lines in a space without losing all the stuff over to the right

    It’s not a major problem: VBA is very good for easily manipulating text files. It’s a bit off topic here, so over at these 3 posts
    https://excelfox.com/forum/showthrea...age8#post16366 https://excelfox.com/forum/showthrea...ll=1#post16366
    https://excelfox.com/forum/showthrea...age8#post16485 https://excelfox.com/forum/showthrea...ll=1#post16485
    https://excelfox.com/forum/showthrea...age8#post16491 https://excelfox.com/forum/showthrea...ll=1#post16491

    , I did some simple coding, using as a working example adding a long script to do the IP hosts block.

    ( Here the results: ' Temp7BeforeIPhostsInsert https://app.box.com/s/fttlmwny6y4s5ub1q66kvqbrw2ppxdwz
    https://i.postimg.cc/T2K3rjbC/hosts-Before-2022-04.jpg

    ' blockIPhostsRawAll250 https://app.box.com/s/7019x59uvvxt7osvb0tojr0z4g7bfdgk
    https://i.postimg.cc/pV3Xk9Yx/hosts-After-2022-04.jpg

    ' Temp8.ps1 https://app.box.com/s/9b9li86s7dyysr7exdle30pckgp7vscz
    )


    Temp8_02Apr2022.ps1 https://app.box.com/s/zz99n0yry1ssjs5wy3g0hj1qtwtpcnm1
    Last edited by DocAElstein; 04-06-2022 at 06:19 PM.

  3. #513
    Fuhrer, Vierte Reich DocAElstein's Avatar
    Join Date
    Aug 2014
    Posts
    9,313
    Rep Power
    10
    FAQs links on GUI
    Chris has a few links to specific videos. I will use that technique to link to my FAQs ( My FAQs start here, from around post 60 https://excelfox.com/forum/showthrea...e-Excel/page60
    https://excelfox.com/forum/showthread.php/2408-Windows-10-and-Office-Excel/page60
    )
    This bit, for example puts a wide red banner button, ( its just a wide button ).
    Code:
     $urlfixwinstartup = Create-Button -Text " !! READ FAQs!! Fixes&TWEAKs may help you take control of your computer, but you are responsible. RED CAN DO DAMAGE" -FntSz 8 -Width 700 -Height 20 -ClmX 100 -RwY 85 -FClr "#FFFFFF" -BClr "#FF0000"  #    #FF0000   is html red    #FFFFFF  is html white
    (The strange variable name is just because I used one of Chris’s button). I did not need to do anything else, except change the html on the Add_Click , ( https://i.postimg.cc/RFMBYNhM/Put-my...url-button.jpg ) , because of the existing script there from Chris


    This next one is completely mine. It puts a small Green button as for FAQs Main Tweaks
    Code:
     $urlMainTweeaksFAQ = Create-Button -Text "! FAQs MainTweaks" -FntSz 8 -Width 130 -Height 20 -ClmX 670 -RwY 205 -FClr "#FFFFFF" -BClr [color="#8C001A"]"#008000"[/color]   # #008000 is html Green 
    I had to then do some more steps
    _ a bit further down I added the variable to the Form Controls
    https://i.postimg.cc/C5tn1L0y/Main-T...m-Controls.jpg
    _ Further down again, I made the Add_Click
    https://i.postimg.cc/sXmCpsVv/My-Mai...url-button.jpg
    Code:
    $urlMainTweeaksFAQ.Add_Click({
    Start-Process "https://www.excelfox.com/forum/showthread.php/2408-Windows-10-and-Office-Excel/page60#post12965" 
    })
    Here the two buttons as seen on the GUI


    Last edited by DocAElstein; 04-05-2022 at 10:29 PM.

  4. #514
    Fuhrer, Vierte Reich DocAElstein's Avatar
    Join Date
    Aug 2014
    Posts
    9,313
    Rep Power
    10
    Code in Add_Click to function alternative
    In Chris’s script, the main meat of any Debloat tweak script, or install script, or any other thing done after clicking a button, appears in the code section within the .Add_Click , example:

    $winterminal.Add_Click({
    Write-Host "Installing New Windows Terminal"
    $ResultText.text = "`r`n" +"`r`n" + "Installing New Windows Terminal... Please Wait"
    winget install -e Microsoft.WindowsTerminal | Out-Host
    if($?) { Write-Host "Installed New Windows Terminal" }
    $ResultText.text = "`r`n" + "Finished Installing New Windows Terminal" + "`r`n" + "`r`n" + "Ready for Next Task"

    })


    That makes sense as the script within the .Add_Click is what is done when the button, ( in this case the button object variable $winterminal), is clicked by the user.

    But there can be advantages to call an external script from within the .Add_Click. For example, this would give better flexibility in use of the script: The script could then be called from other buttons or other script.
    This basic requirement, often done for convenience, is done by what is typically referred to in coding as a function or sub routine, which in simple terms is just a sub set of coding called from other coding

    Simple examples are perhaps the easiest way to explain this:
    This simple .Add_Click results in a text coming up when you click the button

    $okButton.Add_Click({
    Write-Host "Hello Shit World. Fuck off"
    })


    Using the function idea, that would be done with this

    function SayHelloToTheShitWorld {
    Write-Host "Hello Shit World. Fuck off"
    }

    $okButton.Add_Click({
    SayHelloToTheShitWorld
    })


    What’s going on.
    In simple terms:
    For the non function script, the script associated with the click, wrote a text. ( It was written into the PowerShell window belonging to the opened instance of the PowerShell/ ISE window in which the script is ( - in computer jargon: the script is hosted there in that window or PowerShell shell) )
    That is almost the same for the function case. The slight difference for the function way of doing it is that the script associated with the click sets off the script in the function SayHelloToTheShitWorld which is the same script as previously.

    Important positioning of the function in relation to other things:
    In PowerShell scripts things are not done as immediately as in some other languages. Things are generally done fir the first time, in sequence, as the script is run the first time. Not much is done before. Things tend to be stored the first time they are done or used or passed. They are then held in the memory of the open PowerShell until you close it.
    This has some consequences.
    _ ( Variables may have their type set the first time they are used, which can cause some unexpected results when developing or experimenting or debugging script during re runs. For this reason its often wise to include a command line towards the start of a script like this: Remove-Variable * -ErrorAction SilentlyContinue )
    _ The workings associated with a function are stored as the function is passed. So for our example to work, the function must go above the first time it is used, - so it would not work if placed below the .Add_Click
    _ ( Everything associated with the form is finally available after the form is shown. Hence often the last script line is some sort of .Show code line )
    _._____

    That concludes all we need to know. But in passing it my help get things more into a greater perspective appreciation if we explain the general function idea a little further. This may help avoid confusion later.
    On most computer work and languages, the most simple function version as we showed above would rarely be referred to as a function, rather a simple routine or sub routine. The word function would usually be used for a slightly more advanced form of the basic simple coding whereby something, typically a single variable or single object, would be returned, the specific details of which are a function of, ( or as a result of ) , other things given to the function
    This is a PowerShell script example that extends the previous example slightly:
    A single value is given, 0 or 1, ( in this particular case it could also alternatively be given as True or False ). Depending on what is given, a text may or may not tell you the time at which you used the function. ( As I present it here, I am passing a 0 , so the final texts that come out are
    ___Hello Shit World. Fuck off
    ___I used the function on ....I am not telling you

    Code:
    function SayHelloToTheShitWorld {param([Boolean]$WantDate)
    Write-Host "Hello Shit World. Fuck off"
    if ($WantDate -eq 1) {
    [string]$Hr=(Get-Date).Hour ; [string]$Mn = (Get-Date).Minute
    [string]$Rtn =$Hr + "Hour, " + $Mn + "minutes"
    return ($Rtn)}
    else {return ("....I am not telling you")}
    }
     
    $okButton.Add_Click({ #$vscode.location = New-Object System.Drawing.Point(4,797)
    $DateDone = SayHelloToTheShitWorld -WantDate 0 
    Write-Host "I used the function on $DateDone" 
    })
    A function of this sort may or may not do something itself other than returning something as a function of what it is given.

    The syntax may be a bit off topic for now, but just before we leave this introduction, lets do another function in PowerShell script that is more typical of a simple function example done generally in any introduction to function coding. This function returns a number, the value of which depends on the numbers given. Specifically it gives the sum of those numbers given.
    Code:
    function AddNumbers {param($Num1, $Num2, $Num3, $Num4)
    return ($Num1 + $Num2 + $Num3 + $Num4)
    }
     
    $Reslt = addnumbers -Num2 2 -Num4 3
    Write-Host "Result of summing numbers is $Reslt" # This is always done
     
    $Some.Add_Click({ #$vscode.location = New-Object System.Drawing.Point(4,797)
    $Reslt = addnumbers -Num2 2 -Num4 3
    Write-Host "Result of summing numbers is $Reslt" # This is done if you hit the Some button 
    })


    Share ‘functions.ps1’ https://app.box.com/s/7rmx2zsasymftrikjojjs3p3g1g8lng6


    An application of the function idea to my GUI version
    .
    Last edited by DocAElstein; 04-07-2022 at 09:44 PM.

  5. #515
    Fuhrer, Vierte Reich DocAElstein's Avatar
    Join Date
    Aug 2014
    Posts
    9,313
    Rep Power
    10
    slkhflskhfslkhf

  6. #516
    Fuhrer, Vierte Reich DocAElstein's Avatar
    Join Date
    Aug 2014
    Posts
    9,313
    Rep Power
    10
    Extending download tool options to include chocolatey

    Currently Chris’s tool on first running checks for if the Microsoft App winget is installed. If not, it is installed. This app is somehow used to download other things form a “Microsoft store”.
    Previously Chris had a button to choose to install an alternative downloading app tool, chocolatey, which you can then use to download other things if you choose. ( https://excelfox.com/forum/showthrea...ge51#post12782
    Script: 04.12.2020 The Best Windows 10 Toolbox
    Share ‘Chris2December2020FirstGUI.ps1’ https://app.box.com/s/2btpz9fefsc57eqagy5iz9janq7622zg
    )

    I was thinking of adding a multiple downloading App option, allowing you to use winget or chocolatey. (Those download tools may themselves first needs to be downloaded )
    There seems to be some mixed opinions on what is best, Examples : https://www.youtube.com/watch?v=rPfz...RP5PL5l4AaABAg
    https://github.com/ChrisTitusTech/wi...ipt/issues/229

    Originally Chris was keen on, and used , chocolatey. He seems as keen on winget now. But he often swings a bit from one thing to the other. Sometimes it seems justifiable, sometimes it just seems like he is like that.
    I am less keen generally on downloading stuff on the tool, especially as whether it works or not seems to be a bit unpredictable and changes, especially for winget.
    But I might keep the option for now. Having the two options will increase the chance of it working.
    What I thought would be cool is that if the background color of the buttons for you winget or chocolatey would be different, and on clicking them, the download background color of the buttons for the downloads changed correspondingly, and at the same time some flag was set to indicate which of the two download tools should be used
    ( One small complication for now: The winget install does not seem to work in a button.
    https://eileenslounge.com/viewtopic.php?f=12&t=37771
    https://excelfox.com/forum/showthrea...ge51#post16363

    I will ignore that for now, and leave in Chris’s script at the start that installs it if necessary)
    First I have at this stage the winget install button. It’s after most of the other buttons are made, so I can apply the background colour change to the download buttons. I will choose navy for winget and brown for chocolatey

    Examining the existing button I made for winget install, https://excelfox.com/forum/showthrea...6363#post16363 , we see we can make a bit of room by shifting everything down a bit, https://i.postimg.cc/HxVqtwhM/Shift-...make-space.jpg
    A simple ForEach on an array of the relevant download button object variables gives us a convenient way to colour the background of the buttons
    Code:
       $GetWinGet.BackColor = [System.Drawing.ColorTranslator]::FromHtml("#000080") # this could go in the array as well 
       $Dnlds = @($PS, $PS7_2, $winterminal, $notepad, $vscode, $vscodium, $firefox, $gchrome, $mpc)
          ForEach ($Dnld in $Dnlds){$Dnld.BackColor = [System.Drawing.ColorTranslator]::FromHtml("#000080" )} #000080 navy .BackColor.Name is ff000080 
    Later in the buttons, we can use a check on that color to determine what of the download apps is used


    _._________

    Chocalety button
    I don’t have this yet on my current script version, but I have a space that I anticipated using, , and so adding the button is easy, just as I added all the rest:
    Three main things to do, ( It would be only two if I was not using a panel)
    This first bit uses my buttton making function
    Code:
     $GetWinGet = Create-Button -Text "winget" -FntSz 9 -Width 117 -Height 21 -ClmX 3 -RwY 1 -FClr "#FFFFFF" -BClr "#417394"   ;  $Getchoco = Create-Button -Text "chocolatey" -FntSz 9 -Width 117 -Height 21 -ClmX 121 -RwY 1 -FClr "#FFFFFF" -BClr "#417394" 
    This second bit adds the button to a panel
    Code:
     $Panel10.controls.AddRange(@($GetWinGet, $Getchoco))
    ( I don’t need to do the third bit, add the panel to the form, as the panel is that already added and having the winget button )


    The same technique for the background colouring can be applied at the start of, as I add, a new .Add_Click bit for chocolatey.
    https://i.postimg.cc/zGPtFv4H/Added-...-Add-Click.jpg
    It seems to work OK, ( I chose Olive as a common standard html color, close to brown color )
    https://i.postimg.cc/KYCTZkHb/Olive-...chocolatey.jpg


    Before moving on with the download issues, I want to review some downloading PowerShell. I may add a lot more to that later, so I will do it all in its own post, the next one. I may or may not come back to this post.
    Last edited by DocAElstein; 04-08-2022 at 08:16 PM.

  7. #517
    Fuhrer, Vierte Reich DocAElstein's Avatar
    Join Date
    Aug 2014
    Posts
    9,313
    Rep Power
    10
    This is post https://excelfox.com/forum/showthrea...e52#post127912
    https://excelfox.com/forum/showthread.php/2408-Windows-10-and-Office-Excel/page52#post127912


    Collecting a few downloading PowerShell scripts

    I can get some of this info from the archived stuff I recently learnt how to get at, ( https://excelfox.com/forum/showthrea...ge51#post12780
    https://excelfox.com/forum/showthrea...ge41#post12675
    ).
    As well as the basic download app, (chocalatrey or winget, I also look at some other stuff, for example, Richard’s original .Net 3.5, and Brave browser as that was done outside the download app initially


    Richard Newton’s original .Net 3.5, from around March 6 - October 2019, when Chris had not noticed yet that Richard already had a GUI!
    Code:
     $InstallNet35.Add_Click( {
    Write-Host "Initializing the installation of .NET 3.5..."
    DISM /Online /Enable-Feature /FeatureName:NetFx3 /All
    Write-Host ".NET 3.5 has been successfully installed!"
    } )
    Share ‘Richard6March2019GUI.ps1’ https://app.box.com/s/9jb475u0zfxub44hw0sd7212kft6moi7
    In April 2020 it had not changed, nor in April 2022

    _.________

    ChrisFirstScript27July2020.ps1 ( Not GUI )

    Code:
    Function InstallTitusProgs {
    Write-Output "Installing Chocolatey"
    Set-ExecutionPolicy Bypass -Scope Process -Force; [System.Net.ServicePointManager]::SecurityProtocol = [System.Net.ServicePointManager]::SecurityProtocol -bor 3072; iex ((New-Object System.Net.WebClient).DownloadString('https://chocolatey.org/install.ps1'))
    choco install chocolatey-core.extension -y
    Write-Output "Running O&O Shutup with Recommended Settings"
    Import-Module BitsTransfer
    Start-BitsTransfer -Source "https://raw.githubusercontent.com/ChrisTitusTech/win10script/master/ooshutup10.cfg" -Destination ooshutup10.cfg
    Start-BitsTransfer -Source "https://dl5.oo-software.com/files/ooshutup10/OOSU10.exe" -Destination OOSU10.exe
    ./OOSU10.exe ooshutup10.cfg /quiet
    }
    Share ‘ChrisFirstScript27July2020.ps1’ https://app.box.com/s/atcfp24bua063oi2mui4cf9hs5yada39

    _.__________________

    ChrisSecond( He says Version1)Script29Oct2020.ps1

    Function InstallTitusProgs is same as last script, for example to get chocolatey download app
    Brave added fist time

    Code:
    Function InstallBrave {
    do
    {
    Clear-Host
    Write-Host "================ Do You Want to Install Brave Browser? ================"
    Write-Host "Y: Press 'Y' to do this."
    Write-Host "2: Press 'N' to skip this."
    Write-Host "Q: Press 'Q' to stop the entire script."
    $selection = Read-Host "Please make a selection"
    switch ($selection)
    {
    'y' { 
    Invoke-WebRequest -Uri "https://laptop-updates.brave.com/download/CHR253" -OutFile $env:USERPROFILE\Downloads\brave.exe
    ~/Downloads/brave.exe
    }
    'n' { Break }
    'q' { Exit }
    }
    }
    until ($selection -match "y" -or $selection -match "n" -or $selection -match "q")
    
    }
    Share ‘ChrisSecond(Version1)Script29Oct2020.ps1’ https://app.box.com/s/s7zwspwft02klem81c747wpoycarkjac

    _._________________

    Chris2December2020FirstGUI

    Code:
    $installchoco.Add_Click({ 
    Write-Host "Installing Chocolatey"
    Set-ExecutionPolicy Bypass -Scope Process -Force; [System.Net.ServicePointManager]::SecurityProtocol = [System.Net.ServicePointManager]::SecurityProtocol -bor 3072; iex ((New-Object System.Net.WebClient).DownloadString('https://chocolatey.org/install.ps1'))
    choco install chocolatey-core.extension -y
    $wshell.Popup("Operation Completed",0,"Done",0x0)
    })


    $brave.Add_Click({ 
    Invoke-WebRequest -Uri "https://laptop-updates.brave.com/download/CHR253" -OutFile $env:USERPROFILE\Downloads\brave.exe
    ~/Downloads/brave.exe
    })

    Share ‘Chris2December2020FirstGUI.ps1’ https://app.box.com/s/2btpz9fefsc57eqagy5iz9janq7622zg


    _._______________

    Chris7JulySecondGUIGreyGUI2021.ps1
    First use of winget

    Code:
    Try{
    # Check if winget is already installed
    $er = (invoke-expression "winget -v") 2>&1
    if ($lastexitcode) {throw $er}
    Write-Host "winget is already installed."
    }
    Catch{
    # winget is not installed. Install it from the Github release
    Write-Host "winget is not found, installing it right now."
    
    $download = "https://github.com/microsoft/winget-cli/releases/download/v1.0.11692/Microsoft.DesktopAppInstaller_8wekyb3d8bbwe.msixbundle"
    $output = $PSScriptRoot + "\winget-latest.appxbundle"
    Write-Host "Dowloading latest release"
    Invoke-WebRequest -Uri $download -OutFile $output
    
    Write-Host "Installing the package"
    Add-AppxPackage -Path $output
    }
    Finally {
    # Start installing the packages with winget
    #Get-Content .\winget.txt | ForEach-Object {
    # iex ("winget install -e " + $_)
    #}
    }


    $brave.Add_Click({
    Write-Host "Installing Brave Browser"
    winget install BraveSoftware.BraveBrowser | Out-Host
    if($?) { Write-Host "Installed Brave Browser" }
    })
    Share ‘Chris7July2021.ps1’ https://app.box.com/s/2btpz9fefsc57eqagy5iz9janq7622zg


    _.______________________________________

    From here some work was done at GitHub Pulls on how winget was got

    Dynamically get the download Uri for the latest stable release of winget 3 Aug 2021

    Code:
      Try{
    # Check if winget is already installed
    $er = (invoke-expression "winget -v") 2>&1
    if ($lastexitcode) {throw $er}
    Write-Host "winget is already installed."
    }
    Catch{
    # winget is not installed. Install it from the Github release
    Write-Host "winget is not found, installing it right now."
    $asset = Invoke-RestMethod -Method Get -Uri 'https://api.github.com/repos/microsoft/winget-cli/releases/latest' | ForEach-Object assets | Where-Object name -like "*.msixbundle"
    $output = $PSScriptRoot + "\winget-latest.appxbundle"
    Write-Host "Downloading latest winget release"
    Invoke-WebRequest -Uri $asset.browser_download_url -OutFile $output
    Write-Host "Installing the winget package"
    Add-AppxPackage -Path $output
    Write-Host "Cleanup winget install package"
    if (Test-Path -Path $output) {
    Remove-Item $output -Force -ErrorAction SilentlyContinue
    }
    }
    Finally {
    # Start installing the packages with winget
    #Get-Content .\winget.txt | ForEach-Object {
    # iex ("winget install -e " + $_)
    #}
    }
    DynamicGetUriForLatestStablerelOfwinget3Aug2021.ps 1 https://app.box.com/s/7rmx2zsasymftrikjojjs3p3g1g8lng6


    _._______________________________

    MicrosoftStoreWinget28Aug2021

    Code:
     Write-Host "Checking winget..."
    Try{
    # Check if winget is already installed
    $er = (invoke-expression "winget -v") 2>&1
    if ($lastexitcode) {throw $er}
    Write-Host "winget is already installed."
    }
    Catch{
    # winget is not installed. Install it from the Microsoft Store
    Write-Host "winget is not found, installing it right now."
    Start-Process "ms-appinstaller:?source=https://aka.ms/getwinget"
    $nid = (Get-Process AppInstaller).id
    Wait-Process -Id $nid
    }
    Finally {
    # Start installing the packages with winget
    #Get-Content .\winget.txt | ForEach-Object {
    # iex ("winget install -e " + $_)
    #}
    }
    MicrosoftStoreWinget28Aug2021.ps1 https://app.box.com/s/0hde8k4ocsvx57l6ozldd8nxss6l8lmj

    _.________________________________________________ _____

    SlimedWinget31Aug2021
    Code:
     Write-Host "Checking winget..."
    # Check if winget is installed
    if (Test-Path ~\AppData\Local\Microsoft\WindowsApps\winget.exe){
    'Winget Already Installed'
    } 
    else{
    # Installing winget from the Microsoft Store
    Write-Host "Winget not found, installing it now."
    Start-Process "ms-appinstaller:?source=https://aka.ms/getwinget"
    $nid = (Get-Process AppInstaller).Id
    Wait-Process -Id $nid
    Write-Host Winget Installed
    }
    SlimedWinget31Aug2021.ps1 https://app.box.com/s/llsza3dbwdgnvn8no0tl5pr4ink8e2ya
    Last edited by DocAElstein; 04-11-2022 at 01:38 AM.

  8. #518
    Fuhrer, Vierte Reich DocAElstein's Avatar
    Join Date
    Aug 2014
    Posts
    9,313
    Rep Power
    10
    slkhflskhfslkhf

  9. #519
    Fuhrer, Vierte Reich DocAElstein's Avatar
    Join Date
    Aug 2014
    Posts
    9,313
    Rep Power
    10
    This is post #519 https://excelfox.com/forum/showthrea...ge52#post12794
    https://excelfox.com/forum/showthread.php/2408-Windows-10-and-Office-Excel/page52#post12794


    Process Manager

    This is a bit late in the winter for me to be still posting stuff here, and perhaps a bit off-topic, ( actually as it went on, maybe not so off-topic.. )
    By chance I stumbled on a short YouTube play list: https://www.youtube.com/watch?v=Qh_s...qYMCmHkbEIiver
    Initially I saw it as a nice well explained PowerShell GUI series to help my recently acquired PowerShell GUI knowledge. But then as I got more into understanding the second video, ( Process Manager - https://www.youtube.com/watch?v=GQSQ...EIiver&index=2 ) , I suddenly realised that there might be some application to some of my Debloat script ideas.

    I wont take this much further until much later in the year, but these notes are just intended to remind me of what I learnt to the workings of the script, in particular the Process Manager. I am basically working through, and doing a walkthrough explanation of, the script given : https://pastebin.com/b5VMrmz7

    _.___________
    Some basic script coding of relevance/ differences to VBA

    Basic concepts: . and | ( “dot” and “pipe/Piping” )

    I think if you know VBA then you can fairly easily pick up PowerShell.
    There is a similar object orientated hierarchical idea which you get through a . , and that is pretty well the same as in VBA.
    But then there is a similar concept in parallel, a piping, | , which works a bit as its name suggests in that you filter or select/modify things as you go along the pipe sections: Think of it as pipes of different dimensions and / or pipes that filter or use or present the stuff flowing in different ways. The | separates the different sections. Some of the things going on in these stream like piping concepts sections are similar to SQL stuff

    For Each Looping
    In VBA this idea can be shown approximately in this pseudo coding:
    __For Each Thing In theCollectionOfThings
    ___' This section is automatically looped for as many times as we have things, and each thing is put in the variable, Thing. We sometimes refer to Thing as the steering variable, and would need to be of type Variable or Object
    ___ Thing.doingstuff
    ___ Let SomethingElse = Thing.Something
    __Next Thing


    In PowerShell script we can approximately say that we have two ways to do this,
    _ the first is like that in VBA , but just the syntax looks slightly different.
    _ the second way is a bit more weird and needs us to introduce something completely new, which is usually used in conjunction with the looping: This - $_. ( That - $_ could also be used in the first way, but so far I have not seen it used there)
    PowerShell Way1:-
    Same idea , different syntax
    __ For Each ( $Thing In $theCollectionOfThings ) {
    ___# This section works similarly to the VBA case ( In PowerShell script all variable names tart with a $ )
    ___ $Thing.doingstuff
    ___ $SomethingElse = $Thing.Something
    __}


    PowerShellWay2 ( Way2a) and way2b) ):-
    This usually comes about during the piping of stuff, and it is less obvious that a loop happens. But is does. The difficulty in grasping this possibly comes about because the piping idea suggest that lots of things simultaneously are flowing. That can’t really happen., and they are really flowing one after the other, all be it so fast that to us they all are flowing in parallel simultaneously. I think perhaps the development and background low level stuff works so efficiency that it can be considered as if they all are flowing in parallel simultaneously. But as they are in fact looping, we can take advantage of this and “sneak in” a doing something loop. I suppose another way of thinking about this is that we have the ability to customise the filtering/selecting/modifying things going on in the Pipe sections.
    This way 2 is somewhat tricky to understand because, as I write this I have seen two ways to do it, so I am looking at Way2a) and way 2b). But there might be more ways I have not set yet.
    I will demo the two ways I have seen so far with pseudo script/coding examples. I might come back and add here later, if I come across more ways
    Way2a)
    _SomeThingsInThePipe | where { $_.Name –noteegaulto “Fred” } | hgIUdh………….
    In that script/code snippet we have effectively looped to remove thee things that had the name of “Fred”
    In that script/code snippet we have used for the first time the strange , $_ , which is the new PowerShell thing
    This is used to access the current thing or object in the looping process.
    So it is approximately equal to the Thing or $Thing in the previous examples:
    Approximately
    ____________Thing = $Thing = $_
    ( Note: This Way2a) may be a debatable one. It suggest to me it’s a For-Each thing. Mostly it’s not indicated as such by others. Possibly the Where thing is an old SQL thing, and not generally regarded as a thing that loops. I am not sure: The use of the $_ suggested to me that we are in a loop)
    Way2b)
    In the last example, the use of where, may have indicated to PowerShell that we are wanting to do something in a loop to the things “passing in the pipe”.
    We can also more explicitly indicate that we want to loop the things “passing in the pipe”. This then resembles the VBA and First PowerShell examples:
    _SomeThingsInThePipe | ForEach ( {
    ___ $_.doingstuff
    ___ $SomethingElse = $_.Something
    __ } )


    I expect there is some inter changeability in using alternative ways, which I may come back to demonstrating later.
    For now, with the gained knowledge I will go back to the script walkthrough and expanded explanations.
    Last edited by DocAElstein; 04-15-2022 at 01:51 PM.

  10. #520
    Fuhrer, Vierte Reich DocAElstein's Avatar
    Join Date
    Aug 2014
    Posts
    9,313
    Rep Power
    10
    Process Manager
    Introduction:

    So back to this “Process Manager”
    ( Process Manager - https://www.youtube.com/watch?v=GQSQ...EIiver&index=2
    https://pastebin.com/b5VMrmz7
    my version with expanded comments , Share ‘XS86Video2ProcessManager.ps1’ https://app.box.com/s/sig74y36c4tptmkumm62obznpef77iqz
    )

    I am not intending a full walkthrough of that script, as this is just notes on some important parts for my later reference. This is an overview that may help the more detailed comment navigation of the script.
    This first post will attempt to give an overview of the function to get the Processes complete with some detail, and then the nest post will look again in a bit more detail, and finally also cover the shorter function that stops the selected processes


    Basic idea: What does the script do
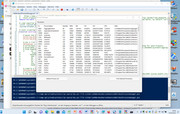
    This brings up inside a GUI, a ListView of a computers Processes, from which we could then select and stop some.


    ListView on a GUI##
    The script lines for this are very similar for those for the GUI itself or for those for a Panel.
    Basically it initially requires declaring a variable to a list view object, which then has its properties assigned in the usual OOP way.
    These are the main first 3 lines,
    $listview_Processes = New-Object System.Windows.Forms.ListView
    $listview_Processes.Location = New-Object System.Drawing.Size(8, 40)
    $listview_Processes.Size = New-Object System.Drawing.Size(800, 402)

    , then there are a few self explanatory lines defining properties
    , and then finally we have a controls .Add line
    $Form_HelloWorld.Controls.Add($listview_Processes)

    Functions to get the processes and to stop them
    A couple of significant differences to VBA and PowerShell script in regards to functions
    _ PowerShell script seems to not work as immediately as VBA.
    _ The functions in PowerShell are within the main script itself

    The result of this is that we need to put the functions at the top of the main script: They need to be passed through at least once. After that they are held in memory of the current open PowerShell shell/window session. (**It seems OK to use variables in the function which are not yet declared: Our variable for the Listview,
    $listview_Processes = New-Object System.Windows.Forms.ListView
    , is not declared until later down in the script )


    Function GetProcesses{
    }

    Function GetProcesses{
    We start with some clearing of the $Listview_Processes object variable , even though at the top of the script , that variable has not been declared or set to anything yet**

    We use a variable, $Processes for a sub set of the things in computer’s processes , ( they might actually be all of them ). I think them that we obtain an array of all those processes.
    In some way that is not completely clear to me, a script line like this,
    $AProcessProperties = $Processes[0].psObject.Properties
    , is returning me something that has, possibly amongst other things, the typical headings for the first Processes. ( I think using the first Process , item 0 , is arbitrary. Any process would do )

    # Make “columns”
    I think adding a “column” is based on a more abstract part of making the Listview.
    The script line uses the word Column, which is a bit strange, as the corresponding word row does not exist. ( Neither does the word record. Instead we have Item later where we might have expected row or record)
    This word Column might have been just as inappropriate as the word Field, so god knows why Column was used, other than perhaps no one really knows what’s going on, Lol
    It seems that we use Way2b) of a ForEach loop to Add the “Columns”, and this is done by giving some text name which effectively becomes the column or field header, in other words what appears across the top.
    So the loop is a ForEach applied to our first Process variable, $AProcessProperties
    ____$AProcessProperties | ForEach-Object ( {
    _____ $listview_Processes.Columns.Add("$($_.Name)")
    ____} )

    As ever we are flexible with the syntax, and the following is exactly the same
    __$AProcessProperties | ForEach-Object ( {$listview_Processes.Columns.Add("$($_.Name)")} )


    __The next part is the remaining main script to fill the list view.
    It comprises of a main Outer ForNext loop ######## , and then an Inner loop, -------##. Based on my explanations in the last post, in particular for way2a) , the inner loop section could be considered as two loops, one after the other
    Filling “rows” of data.
    The filling of “rows” in the listview is a slightly vague concept, similar to that for adding the “columns”, but at first glance the two concepts seem a bit mismatched:
    So far we have a seemingly equally important set of headings. But as we move on now, to fill the rows, it seems that the first column has some sort of higher significance.
    It’s a bit weird:
    The main outer loop is reasonably clear, the rest is a bit weird. The main outer loop is all the processes,
    __ ForEach ($Process in $Processes){ ########


    __ } _______________________________ ########

    That makes sense: A row for a process
    The column filling is a bit weird. It seems as if a “row” is considered an Item but that Item can be text or any unique number, like the left most column in an Excel spreadsheet, except that it does not have to be sequential numbers** and, this is the most peculiar, at the top of this first column is the first header value. That is weird. That is as if, for example our Excel spreadsheet looked like this
    header1
    Header 2
    A Header
    Last Column Header
    345
    232
    36
    So in the script that I am walking through, it looks like we try to make that first column look like a normal first column, then add the other column values. Weird!
    Just to confuse things a bit more, we can actually access later the “row” or Items by sequential number that starts at zero and goes down like, pseudo this strange situation
    header1
    Header2
    A Header
    Last Column Header
    0\345
    1\232
    2\36
    # Make a “row”s( Item )######################## MAIN Script LOOP
    So far, (what we have already done: it appears that the Column(headers) some how belong to the .Net Forms thing which were defined in the initial script lines## for the variable $listview_Processes
    $listview_Processes = New-Object System.Windows.Forms.ListView
    $listview_Processes.Location = New-Object System.Drawing.Size(8, 40)
    $listview_Processes.Size = New-Object System.Drawing.Size(800, 402)

    So that object thing has somehow “columns” as part of it.
    But now as we move on, it appears that we must make a new object thing for each for each row , and add that to the ListView
    Best recap that again: make a ListView
    _ Make a ListView object, add that object to the form, add columns to the ListView object
    _ __ For Each row you want ( {
    _____ make a ListView”row”(Item) object, add that object to the ListView object } )
    So its all a bit crazy and mental. Never mind. Onward
    So the main outer loop ####### on the script is for all “rows”, and it starts with
    ___ ForEach ($Process in $Processes)
    , and then the next line is the object thing that we need to make a “row” ( Item )
    ____ $ProcessListViewItem = New-Object System.Windows.Forms.ListViewItem(
    This seems to need some identifier, and will be the “left margin” number so we choose it for convenience to be what we want in the first column. So this may be a fiddle to use that “left margin” identifying “Item” as a normal column ………….System.Windows.Forms.ListViewItem( $Process.Id)
    At this point we effectively have an object thing which need to be added to in order to give it the entire “row”/ record data. The obscure way this is done is by adding to the Item , “sub items”.
    ## SubItems ##--
    It would appear that what we perceive as the columns from the second column, are regarded in the obscure PowerShell syntax as SubItems

    As this is all getting a bit crazy, and the main loop introduces a lot of even more crazy and obscure PowerShell object concepts so we had best start a new post for it.

    This schematic attempts to summarise the situation, but we will go into this and the functions again in more detail in the next post

    header1 header2 A Header Last Header <-- This bit with the created “column” is part of the main ListView object
    0\ 345
    SubItem SubItem SubItem <-- This brown thing is a ListViewItem object. It has an Item number of 0,
    and an Item identifier/name of 345
    Item 0
    1\ 232
    SubItem SubItem SubItem <-- This blue thing is a ListViewItem object. It has an Item number of 1,
    and an Item identifier/name of 232
    Item 1
    2\ 36
    SubItem SubItem SubItem <-- This purple thing is a ListViewItem object. It has an Item number of 2
    and an Item identifier/name of 36
    Item 2
    __
    In the above schematic we are showing 4 objects. The last three belong to the first one, ( after they have been ned to it ).
    The values in the first column somehow belong to the main ListView object.
    SubItems are Added to the ListViewItems
    Last edited by DocAElstein; 04-18-2022 at 12:57 PM.

Similar Threads

  1. Tests and Notes on Range Referrencing
    By DocAElstein in forum Test Area
    Replies: 70
    Last Post: 02-20-2024, 01:54 AM
  2. Tests and Notes for EMail Threads
    By DocAElstein in forum Test Area
    Replies: 29
    Last Post: 11-15-2022, 04:39 PM
  3. Replies: 39
    Last Post: 03-20-2018, 04:09 PM
  4. Notes tests. Excel VBA Folder File Search
    By DocAElstein in forum Test Area
    Replies: 39
    Last Post: 03-20-2018, 04:09 PM
  5. Replies: 2
    Last Post: 12-04-2012, 02:05 PM

Posting Permissions

  • You may not post new threads
  • You may not post replies
  • You may not post attachments
  • You may not edit your posts
  •